Teacher's guide: How to make learning materials accessible
Overview
This summary is a beginners guide for teachers on how to make their lessons more inclusive by improving the accessibility of their learning materials and applying Universal Design for Learning principles.
The summary will cover:
- Universal design for learning (UDL)
- Making your learning materials accessible
- Providing alternate formats of materials
Introduction
As teachers, we can make our lessons and classrooms more inclusive of learners with disabilities. Technology is a vital tool in facilitating such inclusion, but is used most effectively as part of a wider and more holistic inclusive approach. In this summary, we introduce some of the available tools and approaches that can be easily incorporated into the resources and materials we create for our classrooms.
Universal Design for Learning
The importance of Universal Design – accessible design is good for all learners.
Many of the tools and techniques are founded on notions of Universal Design, designs that are not explicitly intended for one or more sets of learners but instead are designed to be inclusive of as many learners as possible. When combined with assistive and accessible technologies, we can ensure that every learner has access to the same materials. When we further recognize that any learner might experience a temporary disability that hinders their learning for a period, we realize that universal design benefits all students. One significant advantage of applying these principles to our design is that they are more likely to be easily read on a range of devices. Whether your learners are working with your content on a computer, a tablet, phone or different device, your ideas and learning points will be equally open to everyone.
The ability to present our resources in different ways, changing the size of print, colours, fonts or even having the document read aloud or converted to Braille, is a critical part of Universal Design.
Universal Design for Learning (UDL) is based upon three core principles.

- Provide multiple means of representation
Learners differ in how they perceive and understand information when presented. Those with differing needs and disabilities, or from diverse language and cultural backgrounds may each learn most effectively when content is presented in different ways or formats. Some engage with information more readily when it is offered visually or as audio rather than as text. Using multiple representations may benefit all learners by helping them to make connections within, and between, concepts. There is no one means of representation that is ideal for all learners and providing options for representation will help many in the class.
- Provide multiple means of action & expression
- Provide multiple means of engagement
All learners differ in what engages or motivates them to learn. This can be influenced by many things including neurology, culture, relevance, familiarity, subjectivity, and background knowledge. Some learners find spontaneity and novelty engaging while others prefer routine. Some like to work alone, while others prefer to cooperate and work alongside peers. There is no single means of engagement that suits all learners in all settings, so providing multiple options for engagement is helpful.
For more information on UDL please visit Cast.
Implementing UDL is based on the idea of creating learning materials that are accessible.
As well as addressing barriers to learning that might arise as a result of a disability, offering content and resources in a variety of formats and presenting content in different ways can help address those students who have a preference for one form over another. Such alternatives may also respond to the neurodiversity of a group of learners.
Each learner is different and may have a preference for one learning style over another. The four learning styles we cover below are visual, auditory, tactile or reading/writing.
Visual
Those with a preference for visual learning tend to enjoy looking at and observing things. They find that pictures, diagrams, and infographics are a good way to understand information and may like to present evidence of learning in a graphic format. When taking notes, they may add visual connections between key points or draw boxes around an idea to emphasise it.
Those who find visualisation an effective mode of presentation will often benefit from presenting ideas on a chalk or whiteboard where they can draw pictures and diagrams. Some visual learners find technologies such as graphic thought organisers or mind-mapping tools especially useful to understand and present complex ideas.
Auditory
Those who prefer an auditory approach to learning tend to focus on sound and listening to information. They prefer to listen to a document read out, or a person speaking rather than work directly with the text. Even when making their own notes they may prefer to speak out their thoughts as they write, and dictation tools on a tablet or computer are often very effective. When presenting their ideas, they may prefer to work with shorter written notes and to speak out their ideas verbally, and the opportunity to present work as a speech or video recording may work well for them.
In the classroom you may find that they follow instructions better when given an opportunity to speak them back to the teacher or a peer to reinforce their understanding; ideas may form through group discussion and debate where they can listen to others and state their own thinking verbally.
Tactile learners
Tactile learners seem to learn best through physical experience and doing things, such as through acting out events or by touching, feeling and handling to understand concepts. Where such a preference is strong there may be a preference for activities that draw upon movement extensively. For tactile learners the ability to move whilst learning can be helpful, such as pacing whilst reading or having small toys to handle whilst listening.
Building activities and creating safe environments that allow a student to move around the school or classroom, such as scavenger hunts or following clues, can be effective ways of helping them to build links between information sources and ideas.
Text or reading learners
Many learners still prefer to assimilate and produce ideas and content through the written word. They may prefer to use text to record their thoughts in diaries or notebooks and read widely.
Most schools and classrooms are well established to support those with this preference. It is the closest to traditional classroom learning, and may include writing essays, undertaking research, and reading. They often benefit from having time to absorb information and opportunities to express their ideas on paper.
Whether these are personal preferences or driven by neuro-diversity, presenting content and facilitating expression in a variety of formats will accommodate the diversity of students within a classroom.
Making your learning materials accessible
For many teachers, a great starting point is to ensure that any documents or slides are designed to be usable and understood by all. Refer to the accessibility toolkit for digital learning materials which includes step-by-step guides based on widely used software programs including Microsoft Word and PowerPoint for making your documents and presentations accessible. These steps can also be used in other programs although the exact details and steps may vary.
The accessibility toolkit contains the following step-by-step guides:
- How to make accessible documents with Microsoft Word.
- How to make accessible presentations with Microsoft Powerpoint.
- How to make accessible ePubs with Microsoft Word and DAISY's WordToEpub plugin.
- How to make accessible PDF with Adobe Acrobat.
- How to make your videos accessible.
Accessibility fundamentals:
The following fundamentals on accessibility can be applied no matter the software program or document type you are creating:
Ensuring clear and concise use of language
Refer to the toolkit for information on software and tools you can use improve the way your content is written for your students.
Some tools that can help you to make sure that your information and instructions are clear and concise including Microsoft word's built-in "Editor" function and 3rd party software such as "Grammarly" which will check the ease of reading of a document and make suggestions to improve it.
In addition to using these tools, these simple guidelines may help you evaluate the clarity and ease of reading of your content. When writing content for students you should seek to:
- Keep your sentences short;
- Use active verbs;
- Use 'you' and 'we’;
- Use words that are appropriate for the reader;
- Don't be afraid to give instructions;
- Avoid nominalizations;
- Use lists where appropriate;
- Avoid acronyms where possible, and write out the full term;
- Avoid jargon, and link all difficult to understand terms to a glossary;
Importantly it is worth ensuring that as you create content, seek to cut down lengthy sentences and replace complex words with simpler ones as much as possible.
Make all content easy to see and read
Use of fonts, colours, contrast, size, layout, headings.
The format and layout of text can make a large difference to the accessibility of your document, especially for learners with low-vision and learning difficulties. One of the interesting ideas behind Universal Design is that the accommodations for some learners benefit everyone. This is true in the way that a more legible font, a readable font-size, a clear layout and structure can benefit everyone, whilst also being more accessible for learners who require them.
Each of the following are simple steps to improve accessibility of text in your documents and improve legibility and compatibility with screen-readers:
- Use a legible font-size
- Choose 'sans serif' font types as they are easiest to read
- Ensure text and background color contrast of at least 3:1
- Don't use color to communicate meaning
- Structure your document using headings, built-in styles, bullets and lists
Always add image descriptions
To make images in your documents accessible to people with little or no vision, you can add written text that sits behind the image as support. These are referred to as “alt tags” or “alt text” as they provide an alternative to the image in text format.
You can add alt tags or alt text to images in all major programs and save them in the format for the students. Students who are given access to download the document or access the materials in a web format, will be able to use a screen reader to hear the alt-text read aloud. If you do not provide a word, PowerPoint, PDF, html version, or ePub version the learner will not be able to benefit from image description.
To learn more about writing image descriptions, refer to the POET image description tool from the diagram center.
The toolkit demonstrates the way to add image descriptions to your documents in different software programs.
Not all PDFs are accessible
PDFs are a format in which accessibility may vary wildly. Most importantly, make sure all text that is in an image is selectable and has been scanned by an OCR (optical character recognition) tool. Adobe Acrobat has one built in. If you are providing a scanned PDF to your students, if the text is burned into the image, there will be no way for blind and low vision students to read this. Popular OCR tools to do this are Adobe Acrobat and Microsoft OneNote. OCR is well developed and functions in English, however not all language support is as well developed.
Refer to the PDF guide in the toolkit for step-by-step instructions on how to do this.
Making videos accessible
Videos are a valuable resource for your students that can act as an engaging tool to enhance learning. Using accessible videos and tools or making your video accessible is crucial for your students who have visual or hearing impairments, but can have much more comprehensive benefits. Closed captions for instance are vital for students who cannot hear, however will benefit all your students. Sometimes your students might need to watch a video with the sound off, especially if at home or in a public space. Captions allow them to engage with your video without annoying those around them. Equally, many people find they can watch a video a twice the normal speed if they are reading the captions rather than listening to the words. For some of your students, this will be a great benefit.<
Refer to our guide to make videos accessible in the toolkit.
Adding a glossary
Adding a glossary to a document or presentation can help students understand unfamiliar words and terminology. These can be done in a variety of ways.
Adding a traditional glossary in a word document, is most easily done manually. Teachers can type a glossary by hand at the end of a document. Whilst, Word has no built-in method of automatically creating a glossary, we can use hyperlinks or the Table of Authorities functionality to create a glossary for one or more documents.
A second approach is to add pop up tooltips to specific words in your text which is especially helpful if documents are to be read onscreen. In the body of the text, the teacher can select the new word or phrase and create and insert a bookmark alongside the text with an individual name. Then by selecting the term again and inserting a hyperlink to "Place in this document" you can insert the definition as a screen tip.
Word will then format your text as a hyperlink, and the tooltip will appear when the user hovers over it.
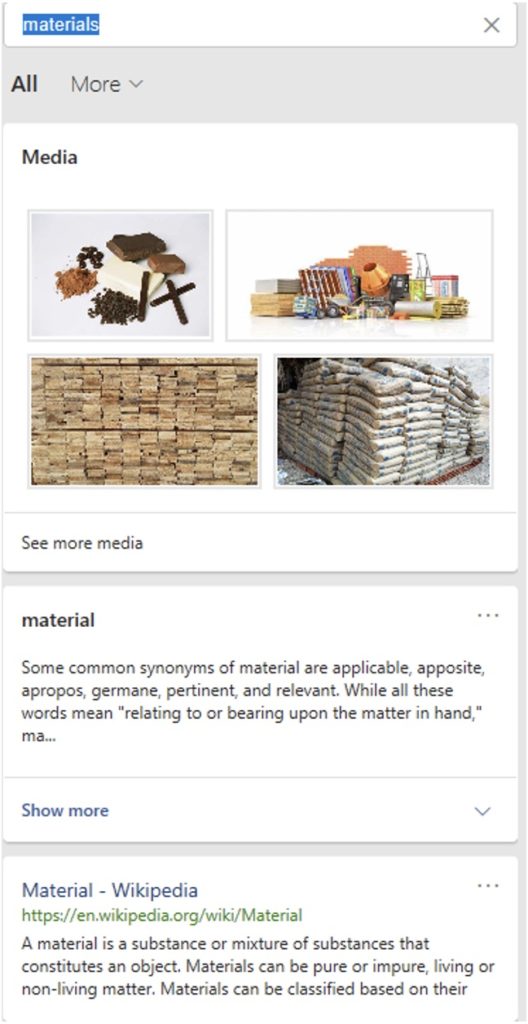
Finally, teachers can link individual words in a document or presentation to an external source such as a dictionary or a website such as Wikipedia. To do so we create a clickable link to a full definition or background in the external source. First select the relevant term and then insert a hyperlink. That hyperlink can be to a third-party site such as Wikipedia and links directly to the additional content.
Students can also be encouraged to right click on words that are unfamiliar and by selecting “search….” Will open a panel in word with images, a definition and link to Wikipedia. In the example below we have searched for “materials”.
Test your materials with accessibility checkers
Checking for accessibility should be done using a combination of automated tools, accessibility checklists and with persons with disabilities. No automated tool can identify all issues so it is vital that you also double check the results of the accessibility checker. Most popular publishing software including Microsoft Word, Powerpoint include automated checkers you can use. If you are creating video and adding sign language, this requires the inclusion of Deaf individuals to confirm the sign language recording is appropriate and follows standards.
Sharing materials in advance
Sharing your materials before you teach the session is helpful for all students. They can become familiar with what you want to teach and think about what they do not understand and what questions they might want to ask. When we think of accessibility in a broad sense, sharing resources in advance is especially helpful for those whose first language isn’t English and those students who need more time to process the content. Some students might use this time to do their own conversion to different formats that are helpful to them, such as converting a document into an mp3 to listen to on the bus on their way home or to school.
Offering alternative formats of materials
Having developed your content to be more accessible, you can add an additional tier of access by allowing your students to choose what format they would prefer to access the materials. Often students have personal preferences, which might include large print, audio only, different coloured paper or backgrounds, or they might choose to listen to your file as an audio recording with or without the text in front of them.
There are many easy-to-use tools for creating audio files such as mp3s from your written work. One of the most widely used is “Zamzar” which offers a free tool where teachers can upload a word document and receive an mp3 recording of the text to download.
Some assistive technologies for those that have a print impairment such as “ClaroRead” will also allow you to save an audio conversion of a written word to listen to later on a different device.
Useful tools that teachers may be able to use include a mixture of free and commercial systems. Some of the online services may be free for personal use but require a license for educational establishments. Useful links to explore further include:
- Robobraille - More information at https://www.robobraille.org/
- Dolphin EasyConverter - More information at https://yourdolphin.com/en-gb/products/organisation/easyconverter
- Obi - More information at https://daisy.org/activities/software/obi/
Using powerpoint in imaginative ways: Creating a narrated speaking book.
It is possible for teachers to be creative and imaginative in developing resources in alternative formats. Mainstream applications such as PowerPoint offer the opportunity to create some unique resources for use in the classroom. One such example would be a narrated speaking book.
To create such a book all you need to do is to copy the content of your book onto a series of slides. If the materials you are using are published under an open license such as Creative Commons, you can develop a version of the book as a “derived work”.
Follow these simple steps:
- Copy each page or paragraph of text onto a separate PowerPoint slide.
- Add any graphics or images that accompany the text onto each slide.
- Ensure you have a good quality microphone and webcam available.
- Using the “Slideshow” tab in PowerPoint, choose “record slide show”.
- Make sure that “always use subtitles” is selected.
- Record your narration.
- Use the webcam to include you speaking, or if you have a sign language interpreter available record the signs as you speak.
- Save the final presentation as a narrated PowerPoint.
- You can also convert the whole file into a video suitable for sharing on social media and YouTube.
More details on creating narrated PowerPoint slides from Microsoft.
Conclusion
Teachers make a difference in creating inclusive classrooms. Many of the tools and techniques discussed here are already part of the technology we use every day; others are free or extremely low-cost. Designing for accessibility of your lessons is a huge step in designing learning for all, and will have a benefit for learning outcomes of your whole classrom.
For more tools, refer to the catalog. For more resources, refer to our resources list.